Creating an expense is the first step to submitting an expense to your manager/HR administrator.
To submit an expense for approval, you must add the expense to a ‘Report.’
To Create an Expense:
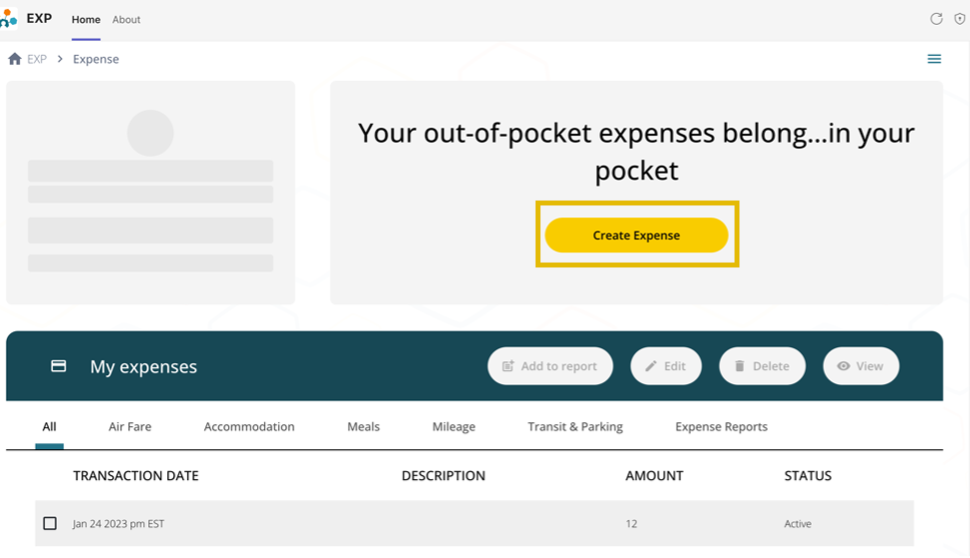
- Start from the EXP Homepage and click on ‘Expense.’

- Click on the ‘Create Expense‘ icon.
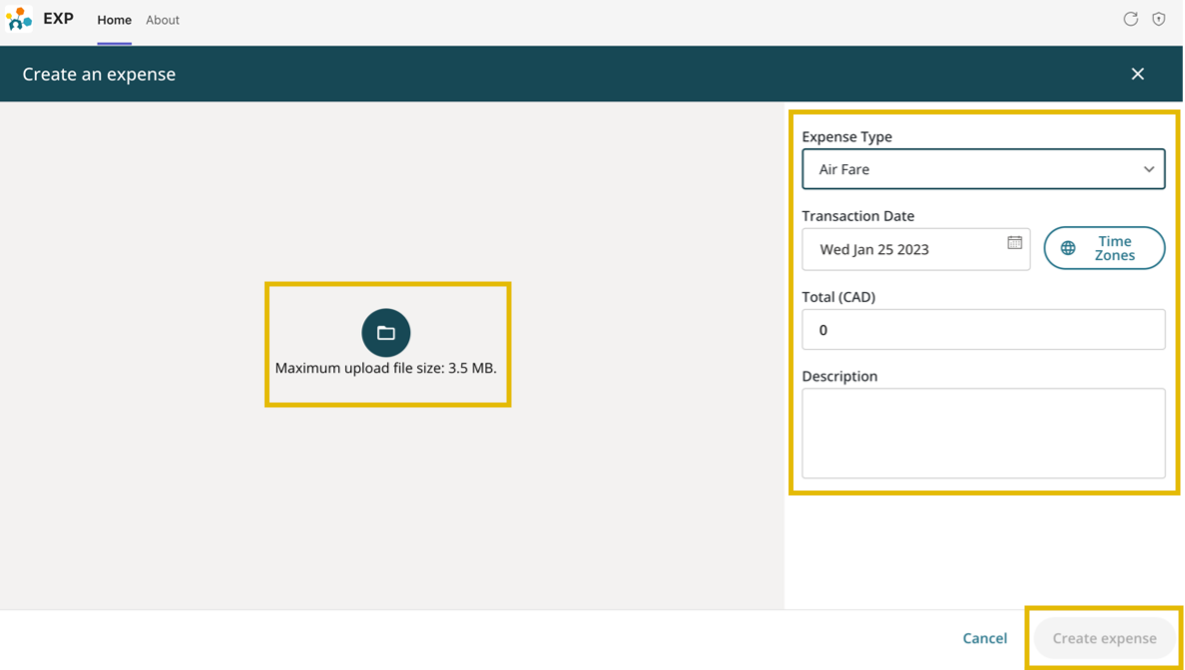
- Click on the Expense Type drop-down menu to select the expense type you want to create (Air Fare, Accommodation, Meals, Mileage, Transit & Parking, etc.).
- Select the date you made the transaction
- Enter the total amount spent and a brief description of the expense type (Ex. Hotel Fees).
- Click on the Folder Icon on the left to attach a photo/soft copy of your receipt. The maximum file size is 3.5MB.
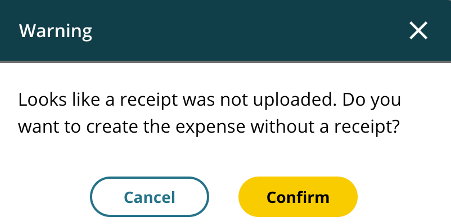
- If no receipt is attached, creating the expense will prompt the user with a warning pop-up.
- Click ‘Create Expense‘ at the bottom of the screen.
- Once created, a pop-ip message will read: “Expense successfully created!” and the entry will become visible under the “My expenses” section.
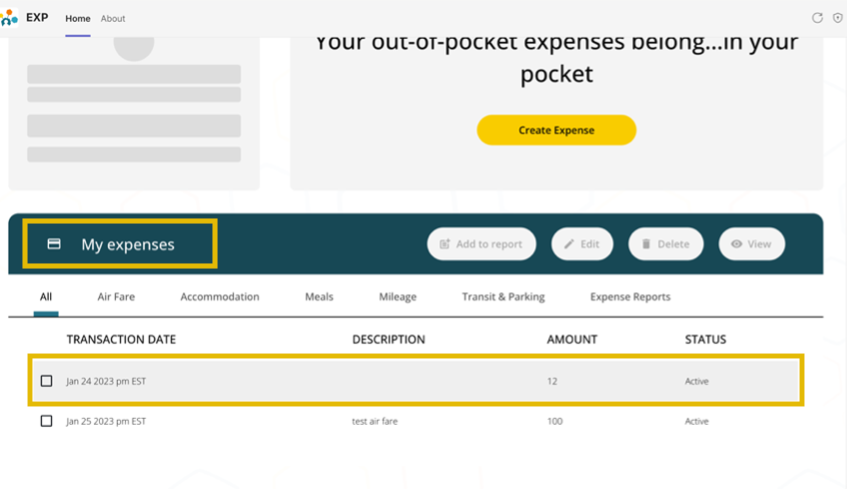
To Add to report, Edit, Delete, or View the Entry, check the small box beside the transaction date first and then select any of the options.
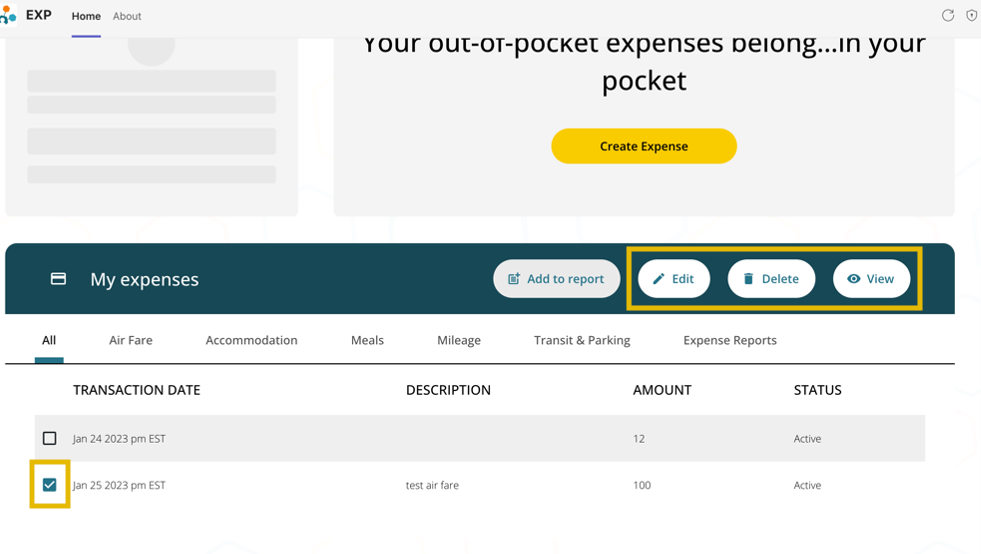
- Selecting ‘Add to report‘ will allow the user to add to an existing report or create a new report.
- Add the expense to an existing report by selecting it from the drop-down menu under ‘Expense Report.’
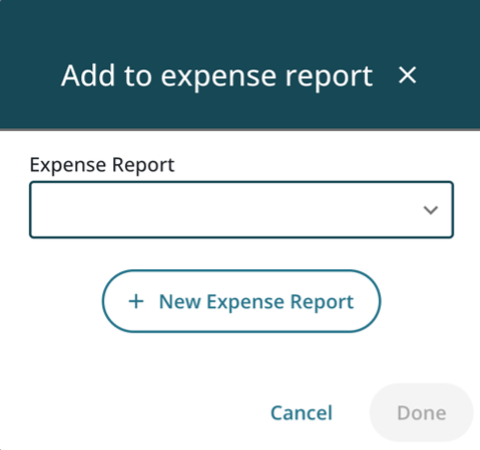
- Add the expense to a new report by selecting ‘New Report‘ and entering the New Expense Report Name and Description.
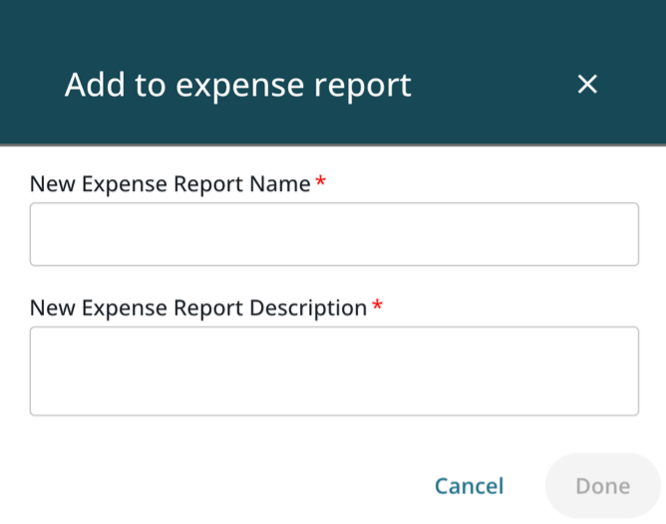
- Click ‘Done‘ to submit the expense for approval.
